Today we close out our design better looking text, some better debris, and compiling our game into a standalone application.
Part 1: Better Text with TextMeshPro
One thing that you may have noticed when working with the Legacy Text objects is that they do not scale well. When scaled up to a larger size, the characters in the text often appear to be blurry, with fuzzy edges. This is because Unity uses a “bitmap” texture – an image of the font – to build your text. It chops up the texture into small rectangles and displays those on your screen. Depending on the original size of your font, this jagged effect – an artifact of upscaling the anti-aliased font image – may be quite pronounced.
Thankfully, Unity offers as its default an alternative solution that can render crisp text at any resolution. TextMeshPro was once a third-party asset, but was so popular that Unity acquired it and now includes it with the engine. It takes a few more steps to set up, and is implemented in a slightly different manner, but the end results are spectacular.
Both set to a font size of 18
TextMeshPro differs from the legacy Unity text system in that it does not display bitmap textures – instead it uses a technique called a Signed Distance Field (SDF). In simple terms, it uses a low resolution image that looks like a blurry version of the font texture and applies a bunch of crazy graphics math on those images to generate a crisp looking render at any distance. If you would like to read more about the process, check out this SIGGRAPH paper from the folks at Valve who invented the technique.
What this means for us is that we cannot simply load and assign a font as we can with a Text object. Instead, we need to generate a Font Atlas by importing a font and letting TextMeshPro process it into one of these fancy blurry texture maps.
To begin, launch the font creator by going to Window > TextMeshPro > Font Asset Creator. If this is the first time you have launched TextMeshPro in this project, you will get a menu asking you to Import TMP Essentials. Click this and install. You do not need to load the Examples & Extras.
Importing Fonts
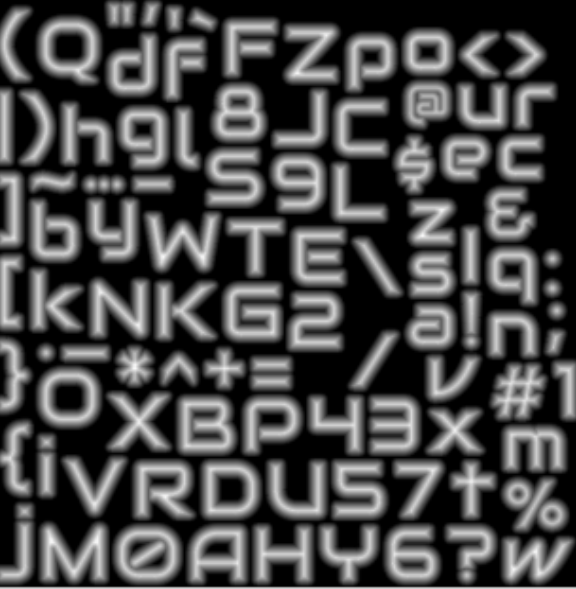
In the Font Asset Creator, assign a Source Font File – this is a font file that you have already loaded into your Assets folder. As a reminder, Unity supports both True-Type Font (.ttf) and Open-Type Font (.otf) formats. Click the Generate Font Atlas button and the creator will generate the font image. Select Save As… to save the font atlas to your asset folder.
TextMeshPro will also create a folder in your Asset directory that includes some instructions and documentation if you want to dig deeper into the settings.
Changing TextMeshPro Text Values
In the past, we used GetComponent<Text>.text to set the value of a text string. TextMeshPro objects have their own component types – one for UI, and one for In-World objects. To access these, you must also call the TMPro library.
using UnityEngine.UI;  // include this if you are using Legacy Text
using TMPro;  // use this if you are using TextMeshPro objects

...

GetComponent<Text>().text = "This is how you set a Unity UI Text value";

GetComponent<TextMeshPro>().text = "This is used for TextMeshPro objects which use the MeshRenderer.  It is best for in-world objects.";

GetComponent<TextMeshProUGUI>().text = "This is used for TextMeshProUGUI objects which use the CanvasRenderer.  It is best used for UI elements.";
Note: There is a big difference between TextMeshProUGUI and TextMeshPro components. One is for UI, the other for in-world. They are not interchangeable.
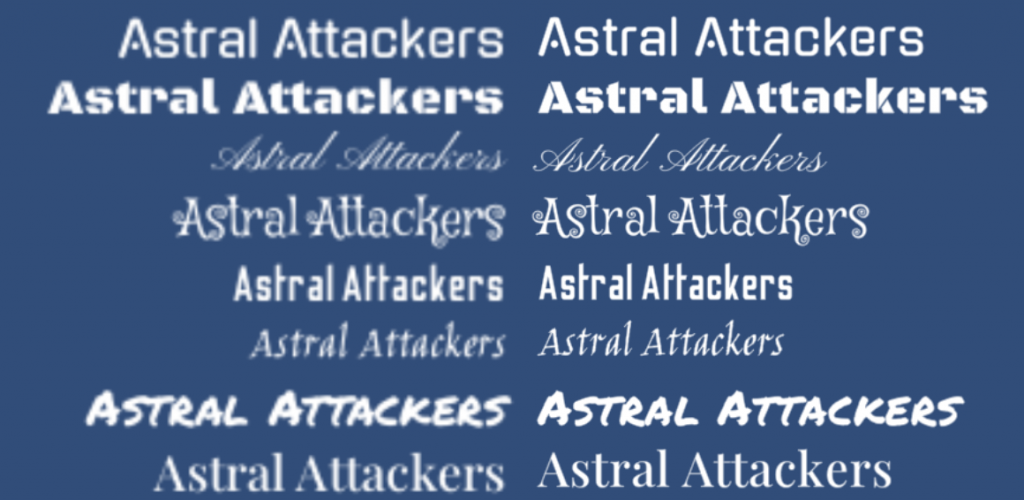
To update our game UI elements, I simply created new TextMeshPro Text objects for the UI, then changed the assignment type of the public variables in our GameManager from “Text” to “TextMeshProUGUI”. The rest continues to work as expected, by updating the content of the .text property.
It has that old 1960’s shadowy government agency vibe that is great for
both spy and sci-fi themes.
Part 2: Building your Application
When we “build” the game, Unity will combine all of our code, all of the assets and packages that we use in the game, and all of it’s underlying systems and combine them into an application (if you are running MacOS) or an executable and a series of support files and folders (if you are running on Windows). Unity is also capable of building to other platforms such as Linux, Android, iOS, PS5, XBox, and HTML5. That’s one of the advantages of working with Unity – the platform specific instructions and abstractions are already built in, making it easy to publish cross platform games.
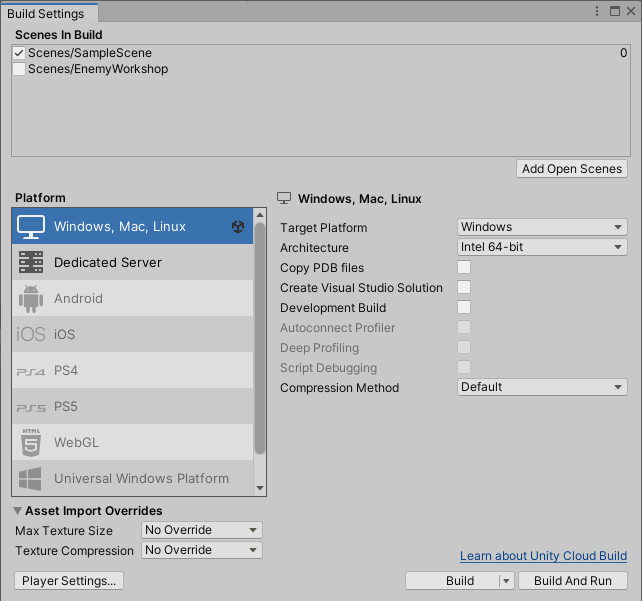
Unity 6 includes a significant overhaul in how it manages building to multiple platforms. Previously, your project was required to be set to one particular build target at a time, those details were configured in the Build Settings window which looked like this:
Unity 6 now includes a Build Profiles system, which allows developers to manage multiple build targets, platform specific settings, and even scene configurations. Through this new system, you can maintain multiple profiles simultaneously and choose which one that you want to build to. While this is incredibly convenient, it does also reorganize some settings that you might want to search for.
When you are ready to publish your game, you will want to open the Build Profiles panel (File > Build Profiles).
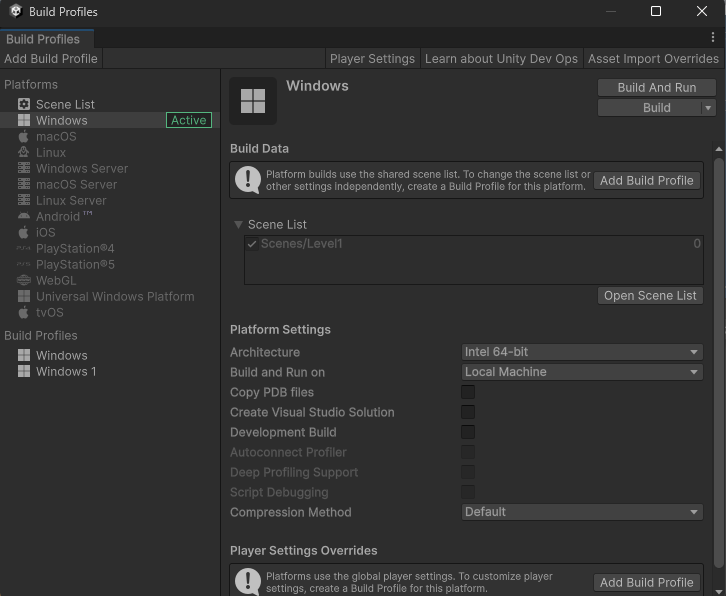
This will open by default to a single profile (here mine is “Windows”). The first thing to do is to add your current scene to the Scene List. You can do this at the profile level on this screen, or go to the SceneList tab for a list that will be shared by all profiles. (The profile specific list is an override that can be used to add or remove some scenes to make them platform specific.)
With a Scene List panel, use the the Add Open Scenes button. This will bring your current scene into the build process. Games can have many scenes, but the build process will only include those that are listed in the Scenes in Build panel above. You can also add scenes by dragging them from the Assets window into this panel. Also note the number to the right – these scenes have an index number defined by order in this process, that can be used to jump to the next or previous scene. We will see this in the next project when we get into Scene Management.
Next, check your Platform Settings to make sure you are building towards the appropriate target. This will be set to the platform you targeted when opening the Editor (the Target setting in Unity Hub). If you change this now, Unity may need to reload the project. For this project, use whatever platform you are currently on – Windows or Mac. While it is possible for one platform to build for the other, we will not get into that in this class.
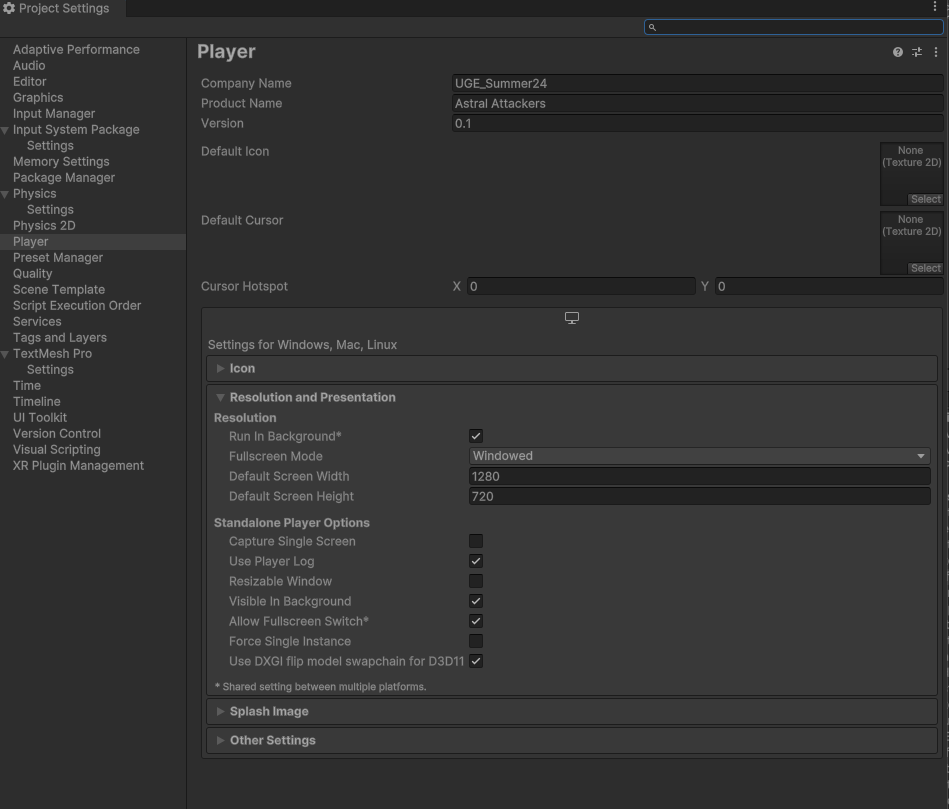
One final step, adjusting the Player Settings. “Player” here refers to the Unity Player – the application in which your game runs. It contains settings for the application itself such as the name, company, version, icon, and default resolution. You can create profile specific Player Settings within a Build Profile, or you can adjust the global Player Settings by going to Project Settings window and selecting the Player tab. The important items to know about in here are the Company and Product name, the Icon, and the Resolution. By default, applications are set to run as Fullscreen.
Once you are ready to publish your game and your settings are correct, click the Build or Build and Run button. Unity will ask you for a location to save this. If you are building for the Windows platform, you will want to create a new folder to contain the various files.
Then you’ll have to wait for a few moments while Unity does its thing. Now is the time where your game engine takes all of your code and objects and compiles them into raw game code and zipped binaries of data. Often this process is short, mostly just compressing files, but if you generating baked lighting and light/reflection probes as part of the build process this may extend the time required to complete this.
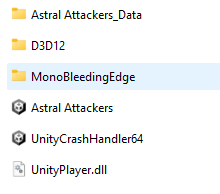
The end result will be either an Application (Mac) or an Executable (Windows) . If you publish for Windows, you will get an “.exe” file and a “Data” folder. (And a few other folders… and a UnityCrashHandler.exe) You need to include these files and folders as they contain contain relevant components – for instance, “Data” holds all of your assets. (Apple users don’t have to worry about this, as both their executable and data are both inside the “application” container.)
Make sure to zip the parent folder.
And that’s it! Now you have a self contained game.
Part 3: Foreach Loop
For the finishing touch on our game, we created some “debris” to rain down when our alien spaceships are destroyed. We accomplished this by creating a prefab object that contains numerous small metallic “chunks”, each with a Rigidbody applied, and then would spawn these at the same time as our explosion particle effect. Unfortunately, when these spawn they sort of just… fall. Not very fun, is it?
To punch this up, let’s add some explosive force to their appearance. Luckily, the Rigidbody type include a function made just for this – AddExplosiveForce( ). This function works by adding a force that originates at a designated point and falls off over a set radius, and the distance and direction to that source location determines how the individual rigidbody will react. However, this force must be applied individually to each object. How can we shortcut this?
This presents us with an ideal case for a foreach loop – a type of loop where we take a set of objects (usually an array, although Lists and Dictionaries will also work) and perform the same action on each item in that set. For this example, we are going to create our set by having the parent prefab object get and return the rigidbody components from each of its children like this:
Rigidbody[] childrenWithRigidbodyComponents = GetComponentsInChildren<Rigidbody>();
This will search through all children of this object and return an array of all of the Rigidbody components attached to those object. Once we have this array, we can apply an action to each one like so:
foreach (Rigidbody thisRB in childrenWithRigidbodyComponents)
{
    thisRB.AddExplosionForce(explosionForce, transform.position, explosionRadius,0, ForceMode.Impulse);
}
To make this work, we write the “foreach” declaration and then in the argument declare a Rigidbody instance (thisRB) from from the Rigidbody[ ] array (childrenWithRigidbodyComponents). Then we apply the force to this instance. Once each pass of the loop has completed, a new instance will be created from the next item in that set, and the process continues until this has run on each element in the array.
Now we have a game that is complete, except for the elements that you will add for your assignment. Next week we will begin to look at 2D applications, including Sprites, Tilemaps, and Animation.
DebrisScript.cs
using UnityEngine;

public class DebrisScript : MonoBehaviour
{
    public float explosionForce;
    public float explosionRadius;

    // Start is called once before the first execution of Update after the MonoBehaviour is created
    void Start()
    {
        // make the debris objects explode outward

        // get the child rigidbody component
        Rigidbody[] childrenWithRigidbodyComponents = GetComponentsInChildren<Rigidbody>();

        foreach (Rigidbody thisRB in childrenWithRigidbodyComponents)
        {
            thisRB.AddExplosionForce(explosionForce, transform.position, explosionRadius,0, ForceMode.Impulse);
            Destroy(thisRB.gameObject, Random.Range(2f, 6f));
        }

        // kill the remaining parent object
        Destroy(this.gameObject, 7f);

    }

}
GameManager.cs
using System.Collections;
using UnityEngine;
using TMPro;
public enum GameState { None, TitleMenu, Playing, GetReady, Oops, GameOver }
public class GameManager : MonoBehaviour
{
// singleton
public static GameManager game;
// game variables
public GameState currentState = GameState.None;
public int score = 0;
public int livesRemaining = 0;
private int LIVES_AT_START = 3;
// mothership objects
public GameObject motherShipPrefab;
public GameObject currentMotherShip;
// UI elements
public TextMeshProUGUI overlayMessageText;
private void Awake()
{
if (game)
{
// the singleton already exists, destroy it
Destroy(this.gameObject);
} else
{
game = this;
}
}
// Start is called once before the first execution of Update after the MonoBehaviour is created
void Start()
{
// put us into the title manager state
currentState = GameState.TitleMenu;
// set the intro message
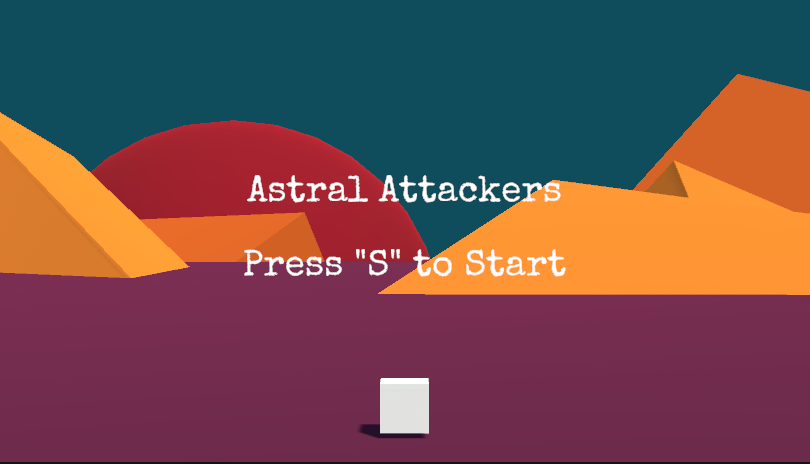
overlayMessageText.text = "Astral Attackers\n\nPress \"S\" to Start";
}
// Update is called once per frame
void Update()
{
if (currentState == GameState.TitleMenu)
{
// game is in menu state, press S will start the game
if (Input.GetKeyDown(KeyCode.S)) { StartANewGame(); }
}
else if (currentState == GameState.GameOver)
{
// press R to restart
}
}
private void StartANewGame()
{
// reset the score
score = 0;
// reset the lives
livesRemaining = LIVES_AT_START;
// reset the round
ResetRound();
}
private void ResetRound()
{
Debug.Log("Resetting Round");
// reset the playing field - spawn a new mothership (instantiate)
if (currentMotherShip) { Destroy(currentMotherShip); }
currentMotherShip = Instantiate(motherShipPrefab);
// put the game into the get ready state
currentState = GameState.GetReady;
// start the background music
SoundManager.S.StartBackgroundMusic();
// start the get ready coroutine
StartCoroutine(GetReady());
}
private IEnumerator GetReady()
{
Debug.Log("Hit the GetReady State");
// set up a screen message to get ready
overlayMessageText.enabled = true;
overlayMessageText.text = "Get Ready!!!";
// pause for a few seconds
yield return new WaitForSeconds(3f);
// turn off the get ready message
overlayMessageText.enabled = false;
// start the round
StartRound();
}
private void StartRound()
{
// tell the mother ship to start its attack
currentMotherShip.GetComponent<MotherShipScript>().StartTheAttack();
// set the gamestate to playing
currentState = GameState.Playing;
}
public void PlayerDestroyed()
{
// stop the music
SoundManager.S.StopBackgroundMusic();
// make the explosion noise
SoundManager.S.MakePlayerExplosion();
// begin the oops state
StartCoroutine(OopsState());
}
private IEnumerator OopsState()
{
// go into the oops gamestate
currentState = GameState.Oops;
// reduce the lives by 1
livesRemaining--;
Debug.Log("Lives Remaining = " + livesRemaining);
// put up the oops message
// tell the mothership to stop the attack
currentMotherShip.GetComponent<MotherShipScript>().StopTheAttack();
// pause for 2 seconds
yield return new WaitForSeconds(2f);
// decide if we reset or if the game is over
if (livesRemaining > 0)
{
// we live to play another day, reset theround
ResetRound();
} else
{
// go to the game over state
currentState = GameState.GameOver;
// run whatever GameOver() script makes sense
}
}
}