It’s time to bring our world to life. Starting today and continuing into tomorrow, we will dive into the wonderful world of animation, specifically how animation is implemented in our engine.
For these lessons, you should download the UGE_Animation package from the course Box folder, found in Day 19 of the course resources. You may notice that the sprites in this package have already been set up and sliced, but you are welcome to attempt to re-slice them if you would like the practice.
Part 1: Simple Sprite Animation
“Moving” sprites share a great deal in common with the old cartoons that your parents (and grandparents) used to watch. The characters and objects that appeared to move were most often generated from a series of individual images, swapped out with one another. These images were painted onto “cels” (short for “celluloid”) which were transparent sheets. These sheets would be placed over a background image and photographed to create a single frame of animation. The “movement” these individual images evoked was due to the similarity of one image to the next, each offset only slightly from the other. Artists would create this smooth motion by defining “keyframes”, or drawings that would represent the start and end of a particular movement, and then generate drawings in between that would approximate the adjustment of items in the first drawing to items of the last, and these frames were known as “in-betweens”.
In our modern software, we rely on similar approaches to create pre-defined animations. For simple sprite animation, we replace the paintings with digital images (and use transparent pixels to replicate the effect of the transparent celluloid sheet). This creates a discrete progression, where each frame of motion is represented with its own distinct sprite. The other method – which we will use most often for animating objects themselves – allow us to define “keyframes” for our properties, and then the engine will “interpolate” the frames that occur in between.
First, we are going to start simple, with an animated sprite. These are very easy to generate – if we have a series of images (or a series of sprites generated through a sprite sheet), we can select these from our Asset Window and drag them into our scene. When you do this, you will be asked to choose a location and name for your “anim” file. This file is an AnimationClip, and it defines the specifics of this particular animation. You will see this along with an Animation Controller file in your Asset folder, likely with the same name as your new GameObject in the scene. Like in the last lesson, your GameObject will have a Sprite Renderer component, but now it will be accompanied by the Animator component.
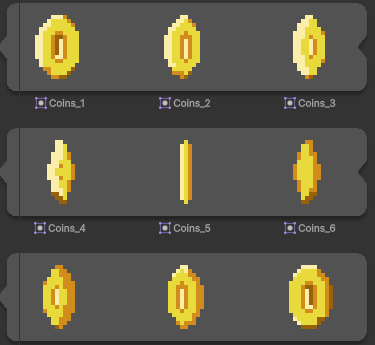
By dragging the individual frames of this coin sheet to the screen, we have created a fancy coin animation.

Easy, right?
Part 2: Tile Animation
So what about adding animation to our Tiles? That process, although the underlying principles are nearly identical, is slightly more complicated due to the way that Unity defines its tiles via Scriptable Objects.
Right-click in your Assets panel, and select Create > 2D > Tiles > Animated Tile. This will create a new object that is your animated tile definition.
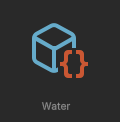
Select this object. In the Inspector, you will see an area indicating that you can drag tiles to define the animation. Drag your sprite frames into this, and then arrange the individual entries into the proper order (if they are not already so).
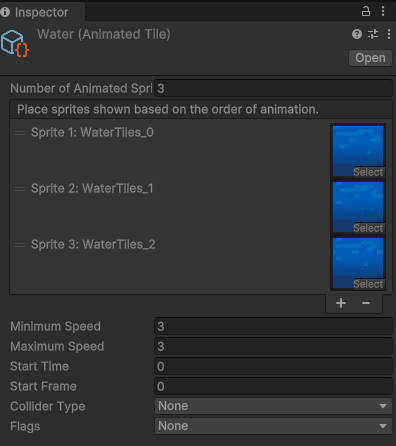
Now you have a tile that you can bring into your Tilemap, either by dragging it directly from the Asset Folder onto your Grid, or by adding it to your Tile Palette (again, dragging the tile into your grid object). If this tile is something you expect to use frequently, such as our water animation, I recommend placing it in your Tile Palette so that you can “paint” it into your grid where needed.
Part 3: Keyframe Animation (Moving Platforms)
Now it is time to make some moving platforms. We start with an “up and down” movement. To do this, we will use the Animation window (not to be confused with the Animator window) to create a keyframed animation.
Before we begin, it is important to note that when you run an animation clip that animates the property of an object, such as position, those values will override everything else. You can make an animated platform, define a prefab, and then copy it all over the board, but when you hit “play” they will all move back to the same position as the original because that it what the animation clip demands. There are two methods to solve this. One is to use the Apply Root Motion checkbox in the Animation component of the object, which will treat this animation as an offset of the transform of the object it is attached to. The other method is to animate them relative to a parent object so that they inherit the world position of the parent and move only in relation to that. In a way, it’s doing the same thing, except giving you a little more control over the placement and movement.
For this reason, it’s always best to build these prefabs by placing all objects at (0,0,0), building your and animating there, then defining your prefab from that object.
NOTE: It is also important to note that any transformation will be applied to animated and their children. This means that our “scale” value can cause objects to move differently than expected or defined. Best to leave “scale” alone if you can, especially if you will be parenting an object like an enemy or player that have movement controls of their own.
First, we create a new platform by creating an empty game object that will serve as our platform parent. We place some child sprites adjacent to one another to define our platform, and then add a Box Collider 2D component to the empty parent object, editing the boundaries to fit the children.
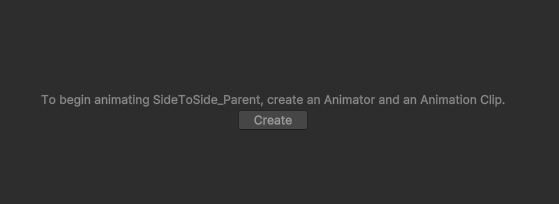
With our parent object selected, open the Animation Window (Window > Animation > Animation) and click the “Create” button to generate a new clip. Give your clip a name.
Once you do this, you will see the Dopesheet, showing the individual frames. We will want to animate the x-position of this platform, so we click Add Property > Transform > Position > +
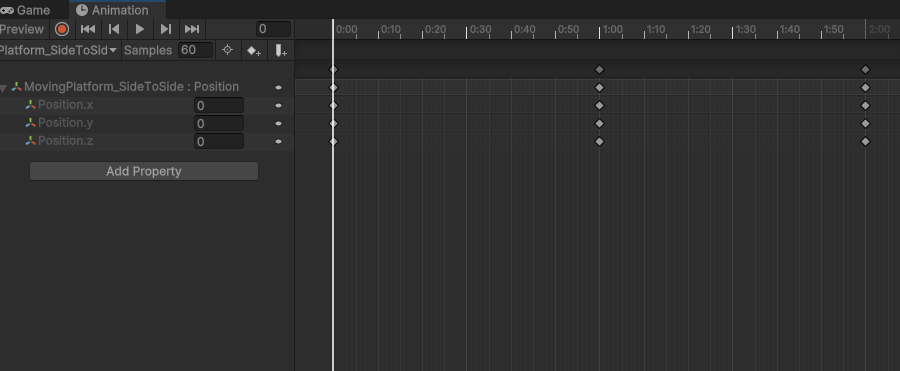
Now your dopesheet will show your Transform channels, and you will see diamonds at the start and end of your clip – these are the keyframes. These are the positions in the timeline when a value is defined. In between these frames, the game engine will interpolate between the values.
Since we want our animation to loop, it is important that the values for the keyframes be the same at the start and end of the clip. By adding the property as we did, Unity automatically creates the start and end position.
Next we want to set a new keyframe – the “right” position of the platform. First we move our time position (indicated by the thin white vertical line on the dopesheet) to the mid-point, here at 0:30. Then we hit the Record button (the red circle in the upper left). This will turn the timeline header from blue to red, indicating that recording is on. Any changes made to the object now will automatically be keyframed into the position on the timeline.
With recording on, select the Move tool and position your gizmo object to the right-most position of your path. (The platform child will follow with you). You will see that a new set of keyframes are generated.
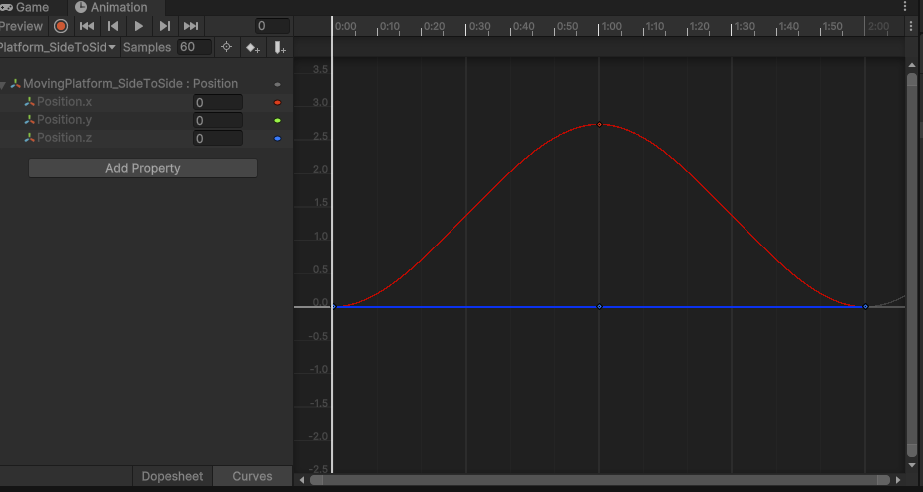
Turn recording off, then hit the Play button and you can watch your platform move up and down. If you want to see how the motion path is defined, use the Curves view, found at the bottom left. Here you can see each property color coded and mapped out over time, and each keyframe is a bezier point with handles that can be edited similar to applications like Illustrator or Photoshop.
Now try it out in your world. If you are happy with the result, drag the top parent object to the Assets window to convert it into a prefab. Then you can move your instance to whatever location you prefer. Run your hero character over and see what happens.
You’ve probably noticed that our hero character isn’t behaving as one would hope. Instead of sticking to the platform, he’s bouncing as we move up and down. And if you created a side-to-side platform, he slides right off.
The problem here is that by creating a slippery rigidbody, we have given up the friction that keep us connected to the objects that we stand on. Also, our platform’s movement is predetermined and falling faster than gravity would initially imply. Our character keeps landing, then falling, catching up and landing again. Thankfully, there is an easy answer to this.
We have already defined the motion of these objects. If we want our player object to move in the exact same way as the platform it is standing on, we can simply make it a child a child of the platform. Rigidbody physics will still be applied in the FixedUpdate, and pull our player down or hold its momentum, but now its position will also adjust with the frames of the animation itself.
Now, unless we want our entire game to play out on this one platform, we need to let the player hop from object to object, meaning we need to let it change parent objects. Basically we need to let a platform “adopt” the player, and then let the player “emancipate” itself by breaking the lineage. This is performed using a simple assignment of parentage that we run in a script attached to our platforms.
StickyPlatform.cs
using UnityEngine;

public class StickyPlatform : MonoBehaviour
{
    private void OnTriggerEnter2D(Collider2D collision)
    {
        if (collision.gameObject.tag == "Player")
        {
            collision.transform.parent = transform;
        }
    }

    private void OnTriggerExit2D(Collider2D collision)
    {
        if (collision.gameObject.tag == "Player")
        {
            collision.transform.parent = null;
        }
    }
}