In today’s class, we looked at a few more advanced techniques to enhance our platform games. The first is Animation Effects, which allow us to call a scripted event from inside an animation clip, which we used to make a “coin box”. Next we looked at 2D Effectors, physics components that let us add behaviors to our collider objects. Let’s go!
Part 1: 2D Effectors
Sometimes our standard platforms don’t quite do what we want them to. Or there are effects we would like to create such as wind, or a conveyor belt, or floating on water. Thankfully, Unity includes a number of “effector” components that modify a standard 2D collider and turn it into a specialty object or zone.
The important thing to keep in mind is that in order for an effector to work, it must be a component on the same object as a 2D collider, and that collider must have the Used by Effector checkbox ticked. Some effectors (like the Platform Effector and Surface Effector) require that the collider be a solid object. Others like the Area Effector and Buoyancy Effector require that the collider be set up as a Trigger. I have a short description of each of these types below, but for more information on how to use them I recommend watching the recording of today’s class.
Platform Effector
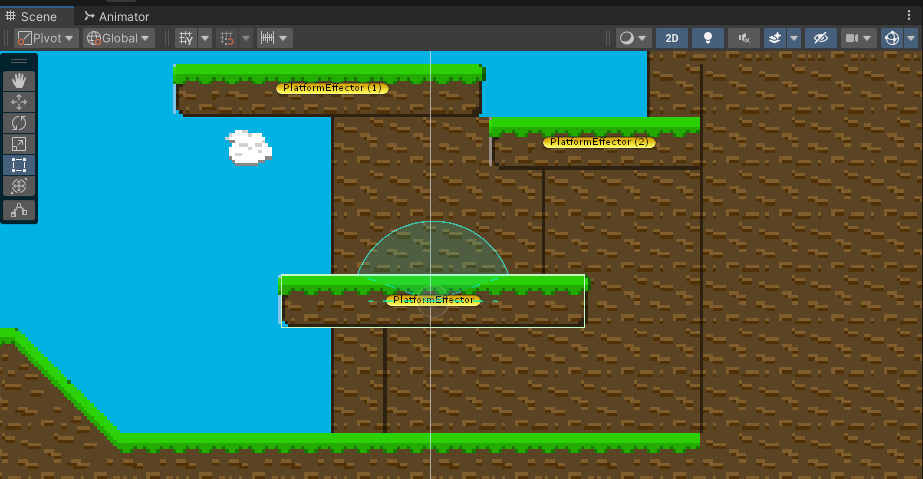
The Platform Effector allow us to create platforms that can be accessed from one direction but solid from another. The most common use of this is a platform that you can jump to from directly underneath, such as in the image below. While these platforms were created in a Tilemap, using the TilemapCollider would result in an impervious surface that my player object cannot jump through.
Instead, I have created a series of empty objects with Box Colliders that fit over these platform tiles, and then added the Platform Effector component to each of these objects. I have set the colliders to Used by Effector, and now I have a one-way platform that will let me pass through as long as I am moving in an upward direction. This is the default setting of 180 degrees, and is represented by the arc in the scene window. This arc and the rotation offset of that arc can be set in the component. You can also mask the physics layer of this effect.
Area Effector
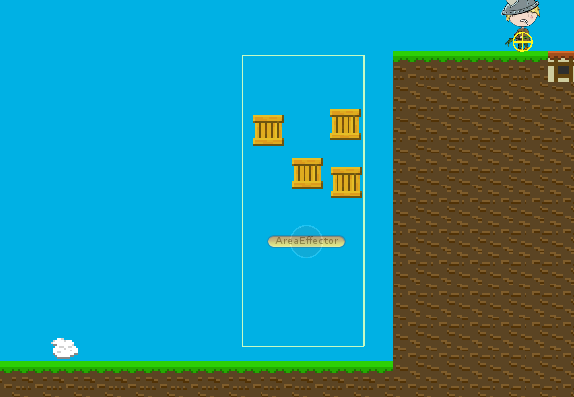
The Area Effector take a Collider that has the Is Trigger property checked, and converts it into a force applying zone of influence. This creates a force applied in a single direction, and you can alter the magnitude of the force, and introduce variations to that magnitude that will apply some randomness into the effect. The Force Target determines whether the force is applied directly to the Rigidbody, or to the Collider itself. If it is the collider, this can generate torque (rotation) if not coinciding the the center of mass. Applying directly to the Rigidbody is the same as applying to the center of mass and so no torque will be generated.
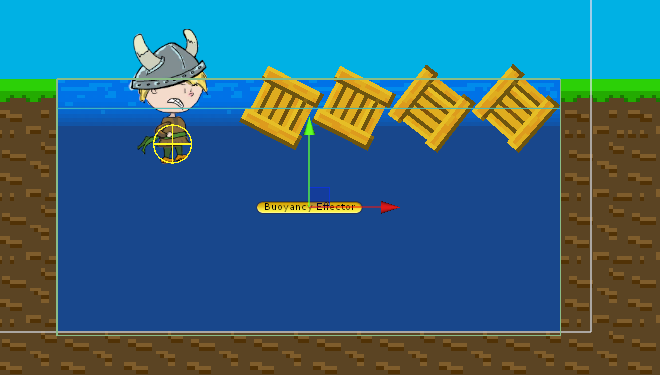
Buoyancy Effector
The Buoyancy Effector is useful for creating water-like settings, where you have a character or objects that have to swim or float within a substance. Here, there is a defined Surface Level and a Density that define how objects should float. The more mass an object has across it’s collider, the less buoyant it is considered to be, and will sink further into the area. You can also define a Flow force to be applied as well, if you want your body of water to have a current.
Surface Effector
Finally, the Surface Effector creates a conveyor like system, where a tangent force is applied along the surface of the collider, at a set speed. The Force Scale is used to adjust how the effector attempts to get the colliding object to arrive at the set speed. A value of 1 will override all other movement such as walking, so a lfesser value is recommended. The Use Contact Force option is similar to the Area Effector’s Force Target. If checked, the force is applied at the contact point of the collider, if unchecked the force is applied to the collider as a whole. (Point of Contact can cause rotational forces to be applied, which made the box in the bottom image spin)
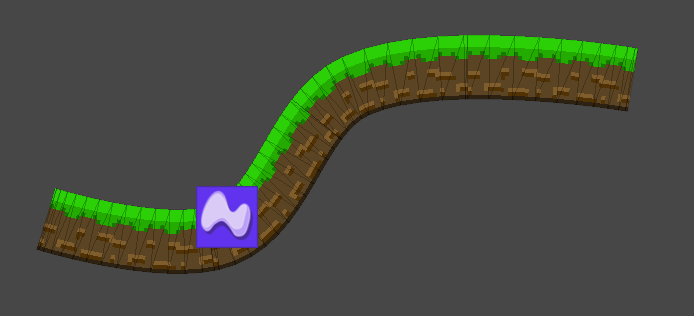
Part 2: Sprite Shapes
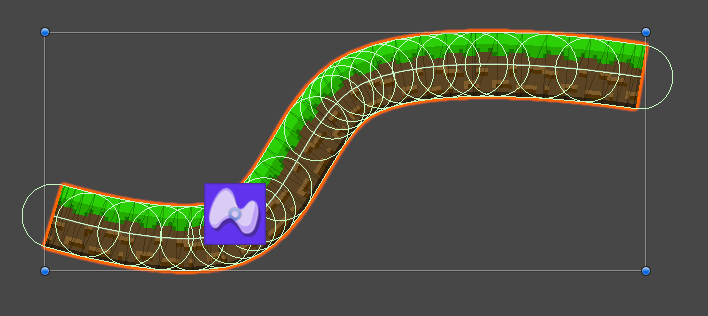
The 2D Sprite Shape is a powerful tool that can be used for advanced world building, one that generates sprites that tile along a path. In our class today, we used this system to generate long and flowing curved platforms, but we really only scratched the surface of what is possible with this shape-building/defining tool.
In order to properly use this, you will need the 2D Sprite Shapes package to be enabled in your game. (If you have used the 2D Template to start your project, this package is already included.)
The first step towards making these shapes is to generate a new Sprite Shape Profile asset. This must be done in the Asset window, and can be created by right-clicking and selecting Create > 2D > Sprite Shape Profile. This will generate a new profile asset, and you will generate one of these for each type of shape profile that you need.

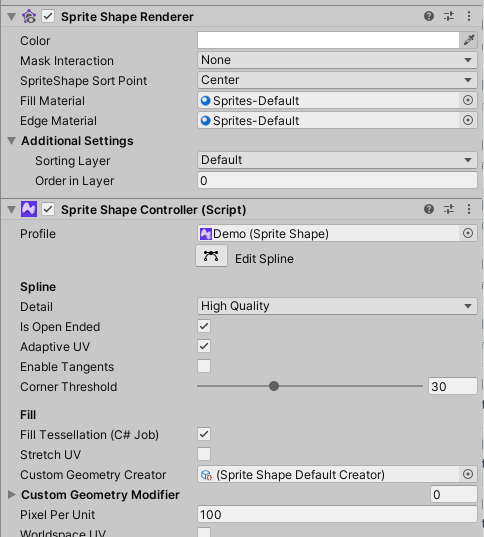
Once you select the profile, you will see the following menu in your Inspector
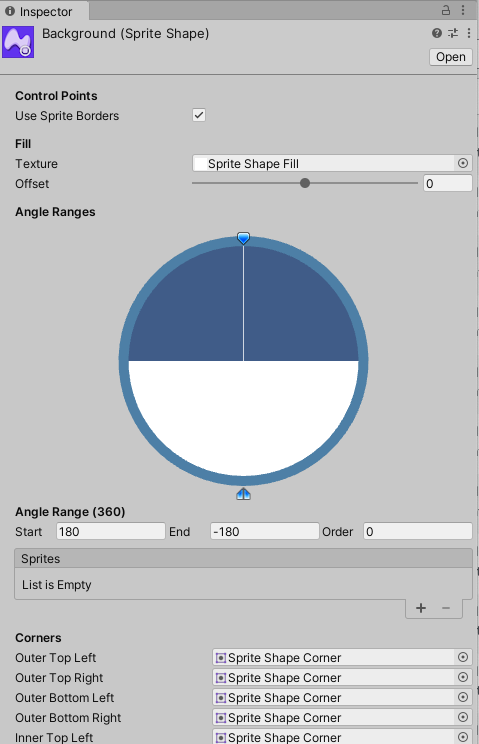
The default profile that is created uses a “Sprite Shape Fill” asset that is included with the package – this is just a white box that can be used to generate shapes, which can be useful for level prototyping, but it is not what we intend to use today. I removed each of these sprite references by setting them to “None” (or just hitting the Delete key).
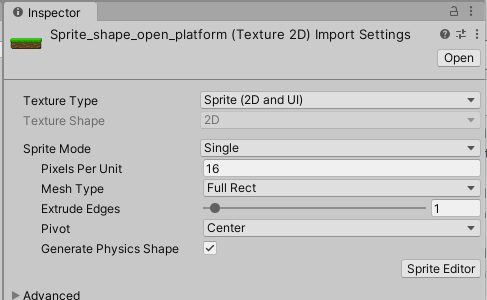
For today’s class, we are going to use a simple sprite that has a repeating middle tile. For this system, it is important to set the sprite’s Mesh Type to Full Rectangle in the Import Settings, otherwise the results may be distorted as Unity attempts to optimize the mesh to fit.
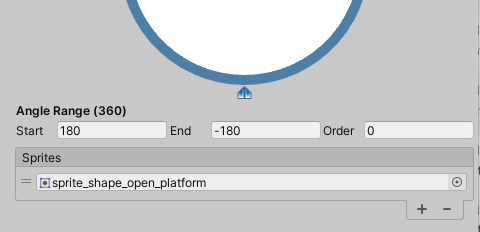
Back in our Sprite Shape Profile, I assign the platform sprite to the “Sprites” slot, like so.
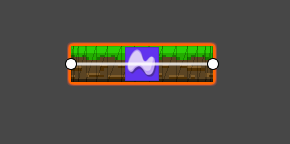
Because this sprite has transparency at the edges, you will see openings between our shape. It may appear like this will create a series of platforms, but really it will generate one continuous shape for us, it is just that part of the shape is transparent. Don’t worry about this now, we will correct this later.
To create a new sprite shape, I drag my Sprite Shape Profile onto the Scene window and it generates a new object. The object is similar to a regular sprite, but with a few modified components:
Here we see the slightly altered Sprite Shape Renderer as well as the Sprite Shape Controller. This controller is where we will make most of our changes. By clicking the Edit Spline button, we see that our platform shape now has dots at the endpoints. We can click and drag these dots to stretch and reposition the point in the line, as well as click at other points on the line to generate new endpoints which can also be positioned.
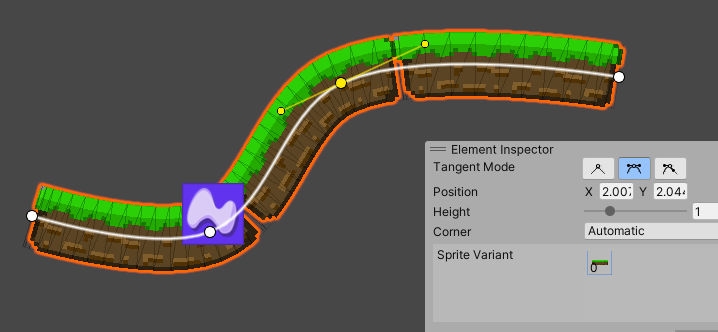
By selecting an endpoint, we can change the behavior of the line at that point by editing the Tangent Mode. This allows us to create a linear intersection, a smoothed intersection with Bezier curve handles, or a “broken” point where the curve handles operate independently of each other. This should be familiar as we saw the same tangent behavior applied to our animation curves.
As we start to create longer shapes, the gap between these is now starting to become a problem. If we would like to make our platform into one continuous curved object, we must modify our sprite definition using the Sprite Editor.
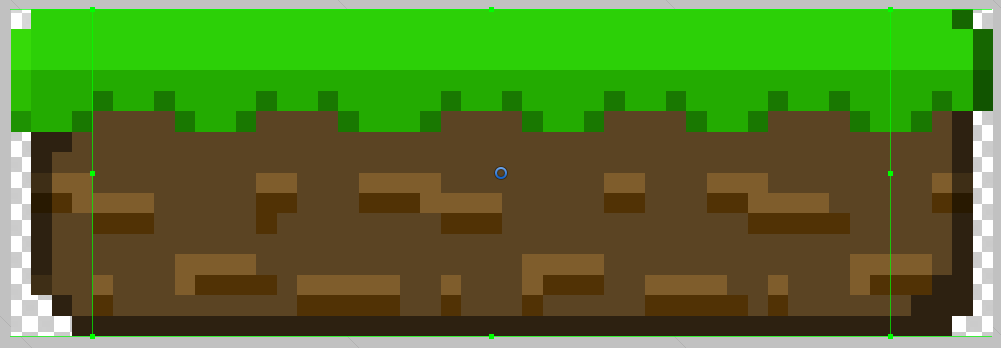
By bringing in the side borders for the sprite, we are now defining the interior repeating element, as well as the endpoint caps that are to be included. Note here that we have also moved the pivot point towards the top, as this will be the point that will sweep along the spline.
The Sprite Shape Profile has a number of powerful features. We can define multiple zones, each corresponding to a different direction so that different sprites are rendered under different conditions. We can also created a closed ended shape which will automatically connect the two endpoints to create a closed object that can also be filled with a repeating sprite pattern.
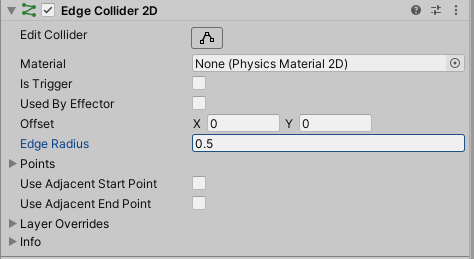
In order to make these platforms walkable, we must also add a collider to this. In this case, that will be the Edge Collider 2D. This will draw a line down the middle of the sprite, but this may not be the effect that you are looking for, especially if you want your player to walk across the top of the platform. One method to correct this might be to use the Y offset for the collider, but the more effective method is to use the Edge Radius to build out a shape that gives this width. While you can edit the line of the collider itself (such as to remove the overrun at the edges) you will want to make sure that Update Collider is turned off in your Sprite Shape Controller, otherwise your changes will be soon overwritten with the Sprite Shape edge.